Voxelab Aquilia S2 is a budget 3D printer that has a convenient PEI build plate and can handle high temperature filaments that other printers can’t.
Should I Buy The Voxelab Aquila S2?
Pros
- Can print at up to 300°C
- Direct-drive extruder
- Flexible PEI build plate
- Good-quality prints out of the box
Cons
- Manual bed levelling
- No touchscreen
Our Verdict
Price When Reviewed
- $299
3D printers have a reputation for being complex and niche devices, but the landscape has changed significantly in the last few years. The newest generation of printers have much better build quality and can produce good results out of the box without the intimidating learning curve.
The Aquila S2 – made by Voxelab, a sub-brand of well-known Chinese manufacturer FlashForge - represents the latest iteration of the popular Aquila line of 3D fused deposition modeling (FDM) printers.
For the uninitiated, FDM printers work by heating filament material, such as the commonly used PLA, to a high temperature, then laying the molten plastic, layer by layer, to create a 3D object. These kinds of printers are great for printing everything from fun toys or ornaments to the more serious business of creating prototypes, without the usual high associated costs of doing that.
The S2 is effectively the flagship model in the range and improves on its siblings in several key ways: a brand new, high-temperature hotend, a direct-drive extruder and a PEI coated build plate (the magnetic, flexible, removable type). In short, this printer can print using a huge range of different filament types that are not possible with other printers in the same price range.
Setup
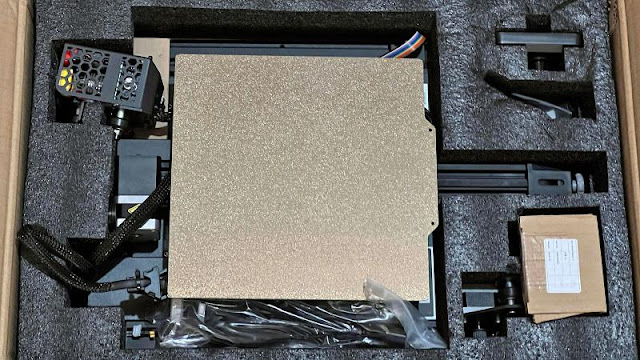
The Voxelab Aquila S2 comes surprisingly well packaged in a box with all the tools you’ll need to assemble it. Instructions are in a printed manual as well as a PDF version on the included SD card.
The base is pre-assembled with a series of profiles, rod, extruder and screen that all need to be screwed together. Assembly is a fairly simple task, following the nine steps documented in the manual.
After assembly, the manual provides instructions for how to level the bed - a manual process with this printer as it lacks a probe for automatic bed levelling. Making the bed perfectly level is a critical step to ensure that the print head is a constant distance from the bed surface. Without performing this step, prints will not succeed.
Again, the instructions are rather basic here and assume some prior knowledge. If you are not familiar with bed levelling, there are many YouTube tutorials that explain the process in much better detail. In particular, the manual gives no guidance on setting the z-offset, a step that is critical to getting good first layer adhesion, even with a PEI bed. Despite the poor instructions, bed levelling was straightforward thanks to the chunky adjuster knobs.
The final step before printing is to load some filament. The instructions say to cut the filament to a 45 degree angle before feeding into the extruder. Unfortunately a pair of filament cutters is not included in the box (they are with almost every other 3D printer) so will need to be purchased separately.
A set of pre-sliced test prints are included on the SD card, so you can start printing as soon as you’ve levelled the bed and loaded some filament. Voxelab included some geometric shapes to test the calibration, a hook and, more usefully, a toolbox that can be attached to the side of the printer. All these test models printed cleanly and without issue.
To aid with testing, Voxelab supplied a reel of rainbow PLA filament which produced eye-catching results with larger prints.
Features & Design
- Direct-drive extruder, hotend capable of 300°C
- Removable magnetic PEI textured build plate
- Build volume: 220x220x240mm
- 4.3in screen with rotary control
At first glance it’s easy to confuse the Voxelab Aquila line of 3D printers with the popular Creality Ender v3 - no surprise as the base model is essentially a clone. But with this new S2 model, Voxelab seems to be trying to break away from clone status by including a higher-spec hotend, capable of reaching 300°C and a flexible magnetic PEI coated build plate
The headline change in the S2 model is the inclusion of a new direct drive extruder. Previous Aquila models had a less-capable Bowden extruder, which separates the motor from the print head to reduce weight on the x-axis gantry. With a direct drive extruder, the motor is coupled with the printhead, reducing the distance that the filament has to travel before being melted - essential for printing with flexible filaments like TPU.
Voxelab has also fitted the S2 with an all-metal hotend that is capable of heating filament to 300°C. Most other 3D printers in this price range can only heat filament to around 250°C. This means with the S2 you have the possibility of printing with a large range of different filament types that can produce smoother or stronger parts – such as carbon fibre-infused PETG.
Another great addition to the S2 is the magnetic flexible PEI coated build plate. The bed itself is heated to help prints stick better - but the PEI coating is a game changer. Simply put, prints stick better to PEI than to glass and don’t require use of additional sprays and glues to get good first-layer adhesion.
I found that I was able to print most parts without the use of a brim. Prints stick so well to the PEI plate that getting them off can sometimes be a challenge. However, rather than using a tool to remove prints and risk damaging the PEI coating, you can simply lift off the magnetic plate and flex it slightly. Then, prints just pop off.
The S2 is available with a choice of different mainboard versions: N32 and H32. I tested an N32 version, but for most users there should be no difference between the two. Advanced users should be able to install custom firmware to either model.
Performance
Cura and Voxelmaker slicing software comes included on the SD card along with the relevant settings and profiles. Slicing software is used to turn 3D models into instructions the printer understands in order to build models layer by layer. I opted to use Cura as it’s pretty much the de facto standard slicing software for 3D printers.
As is common, it was an older version of Cura, so I downloaded the latest version for this review. Some initial setup is required to configure a new printer in Cura, but following the included instructions this only took a few minutes.
Once a print is in progress, many settings - such as z-offset & print speed - can be modified on the fly from the control screen. This can be useful for experimentation but for consistency, once identified, these settings should be entered more permanently in Cura.
The S2 is equipped with silent stepper drives, so the majority of the noise comes from the cooling fans and is easily suppressed by noise-cancelling capabilities in Teams and Zoom - perfect for long-running prints. I wouldn’t recommend sleeping in the same room as the running printer though!
Price & Availability
The Aquila S2 with N32 mainboard can be bought directly from the Voxelab website for US$299. The H32 version costs $10 less. If you’re in Australia or the US, shipping is free.
As you can only pay in US dollars the price has to be converted for other currencies. In UK pounds it works out to around £400 once delivery is factored in. However, the good news for UK readers is that the S2 is also available from Amazon for the much more reasonable price of £279 with free delivery.
The original Aquila base model can still be found online for around £160. This differs from S2 in only the high-temperature hotend and PEI build plate, which can be upgraded to match for a lower overall price. But for those who are new to 3D printing, or who are not confident to perform these upgrades, install custom firmwares and calibrate steps, the S2 is worth the extra money for the convenience it offers.
Verdict
If you’re interested in getting into 3D printing with high temperature filaments, the S2 is a great, reasonably priced option. The printer includes several quality-of-life improvements over the base Aquila, including a direct drive extruder and flexible magnetic PEI base. If there’s one complaint, it’s the lack of auto bed levelling, but once level, the Aquila S2 is very capable and reliably produces high-quality prints.
If you must have automatic bed levelling, then consider the Anycubic Vyper or, of course, the Creality Ender 3 v2 which is available with a CR Touch kit for $285 / £249 at the time of this review. Neither of those can reach 300°C though: the Vyper tops out at 260 and the Ender at 240.
Specs
- FDM 3D printer
- Nozzle Diameter 0.4mm
- Maximum Extruder Temperature =300?
- Print Speed =180 mm/s, 30-60 mm/s
- Maximum platform Temperature =100?
- Filament Compatibility: Best with PLA, ABS, PETG, TPU
- Print PLA-CF, PETG-CF, PET-CF, PA12-CF, PA, PC with hardened nozzle
- Build volume 220*220*240mm
- Layer Thickness 0.1mm-0.4mm
- Print Resolution ±0.2mm
- Printer Dimension 485*344*382(402)mm
- Screen 4.3inch screen
- Weight 8kg
- Input AC 115/230V 50/60HZ
- Power 350w
- Connectivity USB / Memory card offline printing
- Running Noise 50dB
- Working Environment 15-30?


0 comments:
Post a Comment